Language
-
Letzte Beiträge
Meta
Kategorien
Archive
Schlagwörter
3D Arbeit Bastelarbeit Bodensee C-Pop China chinese Cyrodiil Deutschland DSLR Elder Scrolls Fahrrad fail Florida Fußball Gallery Google Himmel Hong Kong html Kamera Köln Lernen Lines Map millennium falcon Morrowind Musik Neu-Ulm neue mitte nulm3d Olympus Photos podracer render Skyrim Sonne Sonnenfinsternis Sonnenuntergang star wars Tamriel Ulm USA Website Weltall
Jul
5
2010
 0
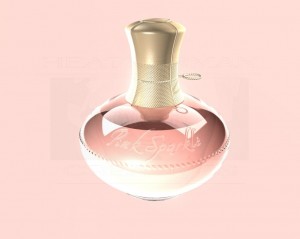
0Actually i never did that before. But when a pal asked me for help I could not reject. Even if this was the first time I made a model inclusive a render of this kind of model, I think I did pretty well so far.
The complete working time have been about 6 hours in a row. Modelling, creating the textures and light setup and rendering. I knew from the beginning, that details like the characters or the reliefs won’t be that easy since I never used them that way. But with the basics i already had (e.g for reliefs on planets), I’ve been half way there already. Diffuse maps, bump maps, normal maps, displacement maps. All those were essential to give the model the “realistic” look. Since I’m rather more specialized on low-polygon models, I try to do the detail trick with the textures, if I like to have a good balance in detail and rendering time. (high polygon count = long render, too many textures = long render as well)
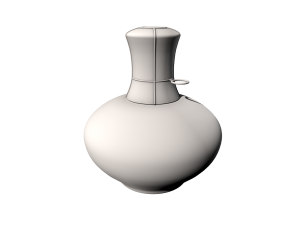
The simple model as you can see just contains the shape of the bottle itself, the cap’s wire and the cap itself. I could either model the structure to give it the depth of detail which are quite outstanding when you add lights, shadows and glass effects. But on the other side as mentioned before, it will increase the time to render the image. I went for the method of using normal maps and displacement maps.
Examples
Bump Map
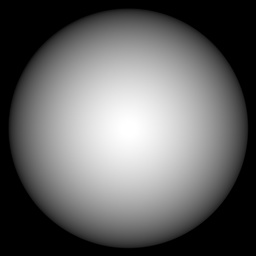
Bump or Displacement Map Texture
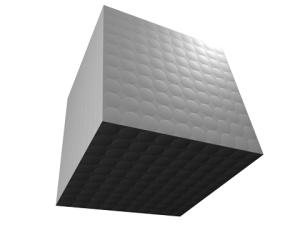
The bump map method is quite simple. The material will add a relief according to the gradient’s difference. Here the black parts mean low profile while the brighter part is the higher profile.
If projected on a cube it looks like that.
Actually it’s a very primitive method which give you a slight surface structure. When specular light is enabled, you have different light reflection on the surface. When you have a very flat view angle to the side of the cube, you realize it’s still flat and you will loose the effect again.
Normal Map
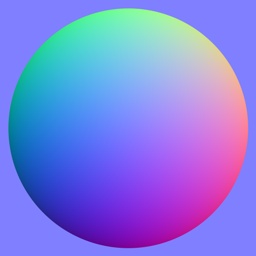
Normal Map
The normal map is a much more advanced method to simulate a surface structure. It calculates light incidence, shadows or even refraction. It’s stronger than bump in this case.
On a cube it would look like this.
Stronger contrast, soft shadow cast and better light reflection are the result of a normal map. But even here you can see, that it’s just a 2-dimensional effect. As soon you have the flat view angle again, it’s flat.
Displacement Map
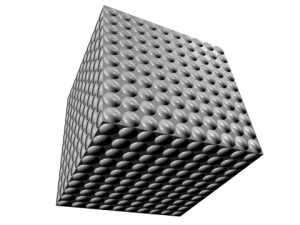
The displacement map is using the same texture as the bump map. The gray scale image works just the same. Dark parts are the lower level while the bright spots are the higher levels (you also can mix that around). On a cube it looks like this.
Now the first time there’s a 3D effect which casts real shadows. The trick in that material is the ability, to add more polygons to the model which are deformed outwards or inwards, according to what the monotone texture tells it to do. The model itself will remain the same but the polygon increase will set in just as you begin to render the image which increases the rendering time of course. But then you get the best detail effect at the end.
After I’ve created all those materials and added them to the model, the result was already fantastic.
But to get a almost realistic looking image, I’ll need materials for the glass, the liquid and the cap. Now I had some time to play around with the parameters till I got something working that looked like glass, plastic or wire. Last but not least I had to setup the lights for the right illumination. That’s still my big weak spot. My computer is not very effective on rendering with global illumination (light gets reflected back from a surface to another one) so used default light sources.
At the end I had a very nice render image and my pal has been very satisfied with my work.
Unfortunately I lost (dunno how) the render file and had to set up the whole lights again. But this time even better.
Despite all that, I never intended to do advertisement for Kylie Minogue’s fragrance, it was my pal’s request (for presentation about marketing strategies) and I followed that one.

